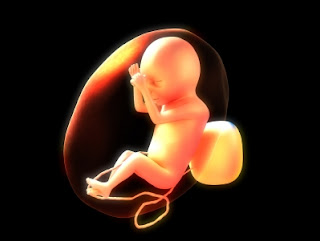
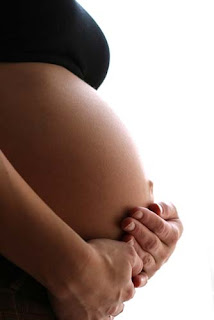
- I choose these two picture


- First, I choose the pregnant belly picture, then I transfer it into Black and White picture using this step
i. go to Image, Adjustment, Black & White
- Then, I resize the image to half because the image is too big.
i. go to Image à Image Size
ii. the Image Size dialog box will open and show the exact size of the picture
width : 2304
height : 3456
iii. Make sure the Constrain Proportions are selected (ü), I change the size into this
width : 1000
height : 1500
- Choose the human-fetus pics, I use Elliptical Marquee Tool, change the Feather to 20px and make selection around the foetus like this
- Then, I use Move Tool, I click and drag the fetus picture to the pregnant belly picture like this
- Then, I go to Edit, Free transform to adjust the position of the fetus so it will be like this
- I create new layer
- Then, I select Horizontal Type Mask tool and type “ … and the journey begins… ” on the new layer. The setting are as follow :
Size : 48
- After typing, I click at Commit any current edits button to accept the text.
- You’ll get like this
- Go back to human fetus file, select all, copy
- Then, go to pregnant belly file, edit,paste into
- The picture will be like this
- And the layer will be like this…
- I click on layer thumbnail on left, Ctrl+T to enlarge the human fetus pic to fits the text.
- Then, I press Enter to apply.
- I Go to Layer,Layer style, stroke, to apply some style as follow :
Distance : 14px
Size : 10px
Bevel and Emboss :
Select Contour
Stroke :
Color : Yellow (#fff600)
- Save
- The finished pic will be like this...


i guess the journey already begun & its on its way... its so good... keep up the good work
ReplyDeleteFor sure you spent a lot of time and efforts on this work. And guess what, you did a good job. It's more than photography, it's a beautiful and meaningful idea. keep up going.
ReplyDeletethank you guys :)
ReplyDeleteHi
ReplyDeleteCheck this out :
https://docs.google.com/leaf?id=0B7yW8RkFtXoNMmM3Nzg4MzQtYjIxNy00MTRhLTliN2MtYTVlNTVhOWNiNjky&sort=name&layout=list&num=50